Debian 9.2 (Stretch) minimal 64 bit installieren
Arbeitsumgebung und notwendige Programme installieren
⦁ Win32Diskimager (erstellt bootfähige USB-Sticks und SD-Karten für Raspberry Pi)
⦁ PUTTY (ist ein schneller und kleiner Telnet-Client für Windows.PUTTY unterstützt das SSH-Protokoll und gewährt so einen sicheren Datenaustausch.)
⦁ WinSCP (ist ein kostenloser Client, der es erlaubt, Secure Copy unter Windows zu nutzen. Die Dateien werden dabei sicher über eine SSH-Verbindung (Secure Shell) ausgetauscht und können mit dem integrierten Texteditor angepasst werden. Die Übertragung aller Daten erfolgt verschlüsselt.)
⦁ HeidiSQL (Interface für Web-Entwickler, das MySQL verwendet; bietet unter anderem Benutzerverwaltung, Import von Textdateien, SQL-Export, Datenbrowser mit komfortablem Grid und Query-Editor mit Syntax-Highlighting.)
⦁ GVEDIT (zur Visualisierung der Bootreihenfolge und deren Beziehungen untereinander zur späteren Optimierung des Bootvorganges)
Win32Diskimager auf PC installieren
Quelle: https://sourceforge.net/projects/win32diskimager/
Den Installationsanweisungen folgen.
Putty installieren, konfigurieren/einrichten
⦁ Download der aktuellen Software (wahlweise 32 oder 64 Bit) unter:
https://www.chiark.greenend.org.uk/~sgtatham/putty/latest.html
⦁ Installieren…
⦁ Konfigurieren:
WinSCP auf PC installieren
WinSCP auf PC installieren
Quelle: https://winscp.net/eng/download.php
Den Installationsanweisungen folgen.
Programm starten
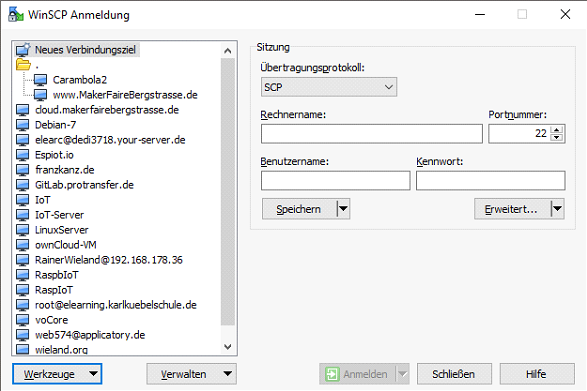
Unter Werkzeuge Einstellungen den Pfad zum bereits installierten PUTTY eintragen

HeideSQL installieren
Quelle: https://www.heidisql.com/download.php
Den Installationsanweisungen folgen…
GVEDIT auf PC installieren
Quelle: http://www.graphviz.org/Download_windows.php
Den Installationsanweisungen folgen.
⦁ Pakete installieren
apt-get update
apt-get upgrade
apt-get dist-upgrade
reboot
mit dmesg > /tmp/dmesg.log log-Datei öffnen und prüfen auf fail, error, warning
apt-get install dnsutils //für dig
apt-get install ntp ntpdate //NetTime
apt-get install insserv graphviz //zur grafischen Aufbereitung der Bootreihenfolge
apt-get install zip
apt-get install unzip
apt-get install locate //zum Suchen
updatedb //ausführen um Dateisuchindex zu aktualisieren (immer wieder vor locate)
apt-get install htop //zum grafischen Überwachen des Servers
htop aufrufen und eventuell konfigurieren
⦁ Pakete für Web-Server
Apache installieren
apt-get install apache2
PHP installieren
apt-get install php7.0 php7.0-cli php7.0-curl php7.0-gd php7.0-geoip php7.0-intl php7.0-json php7.0-mbstring php7.0-mcrypt php7.0-opcache php7.0-readline php7.0-xml php7.0-xsl php7.0-zip php7.0-bz2 libapache2-mod-php7.0 php-imagickAuflisten verbieten
/etc/apache2/apache2.conf

<Directory …>
	Options -Indexes
</Directory>
Webserver testen
/var/www/html/info.php

<?php
    phpinfo(INFO_MODULES);
?>


/etc/apache2/sites-available/DOMAINNAME.conf

<VirtualHost *:80>
  ServerAdmin Rainer@Wieland.org
  ServerName DOMAINNAME
  ServerAlias DOMAINNAME

  DocumentRoot /usr/local/src/DIRECTORY

  ErrorLog ${APACHE_LOG_DIR}/DOMAINNAME.error.log
  CustomLog ${APACHE_LOG_DIR}/DOMAINNAME.access.log combined

	<Directory /var/www/html/DIRECTORY/rrd>
		Order Deny,Allow
		Deny from all
	</Directory>

	<Directory /var/www/html/ DIRECTORY /rrdtool>
		Order Deny,Allow
		Deny from all
	</Directory>

</VirtualHost>


a2ensite DOMAINNAME.conf
/etc/init.d/apache2 restart
/etc/php/7.0/apache2/php.ini
MariaDB (Nachfolger von MySQL) installieren
apt-get install mariadb-server

mysql_secure_installation

<<==snap==>>
Enter current password for root (enter for none):
//PASSWORD EINGEBEN
OK, successfully used password, moving on...

Change the root password? [Y/n]
//N DRÜCKE
 ... skipping.

Remove anonymous users? [Y/n]
//Y DRÜCKE
 ... Success!

Disallow root login remotely? [Y/n]
//Y DRÜCKE
 ... Success!

Remove test database and access to it? [Y/n]
//Y DRÜCKE
 - Dropping test database...
 ... Success!
 - Removing privileges on test database...
 ... Success!

Reload privilege tables now? [Y/n]
//Y DRÜCKE
 ... Success!

All done!

<<==snap==>>

mariadb -u root -p
//PASSWORT ERSETZEN VOR DEM KOPIEREN
GRANT ALL ON *.* TO root@'localhost' IDENTIFIED BY 'PASSWORD' WITH GRANT OPTION;
GRANT ALL ON *.* TO root@127.0.0.1 IDENTIFIED BY 'PASSWORD' WITH GRANT OPTION;
FLUSH PRIVILEGES;
exit
mariadb -u root -p
exit

apt install php libapache2-mod-php php-mysql
apt install php-cli
WordPress installieren
cd /tmp //In das Verzeichnis tmp wechselnAktuelle WordPress-Version auf den Raspberry mit wget herunterladen.
Siehe https://de.wordpress.org/txt-download/
Aktuelle Version: https://de.wordpress.org/wordpress-5.0.3-de_DE.zip

Datei entpacken
unzip wordpress-5.0.3-de_DE.zip
Zielverzeichnis für WordPress anlegen
mkdir /var/www/html/wordpress
Dateien aus dem Temp-Verzeichnis verschieben
mv wordpress/* /var/www/html/wordpress
Datenbank für WordPress anlegen
mariadb -u root -p mysql
MariaDB [mysql]> CREATE DATABASEwordpressDEFAULT CHARACTER SET utf8 COLLATE utf8_bin;
MariaDB [mysql]> GRANT ALL ON wordpress.* TO 'wordpress_user'@'localhost' IDENTIFIED BY 'wordpr355';
MariaDB [mysql]> GRANT ALL ON wordpress.* TO 'wordpress_user'@'127.0.0.1' IDENTIFIED BY 'wordpr355';
MariaDB [mysql]> FLUSH PRIVILEGES;
MariaDB [mysql]> exit
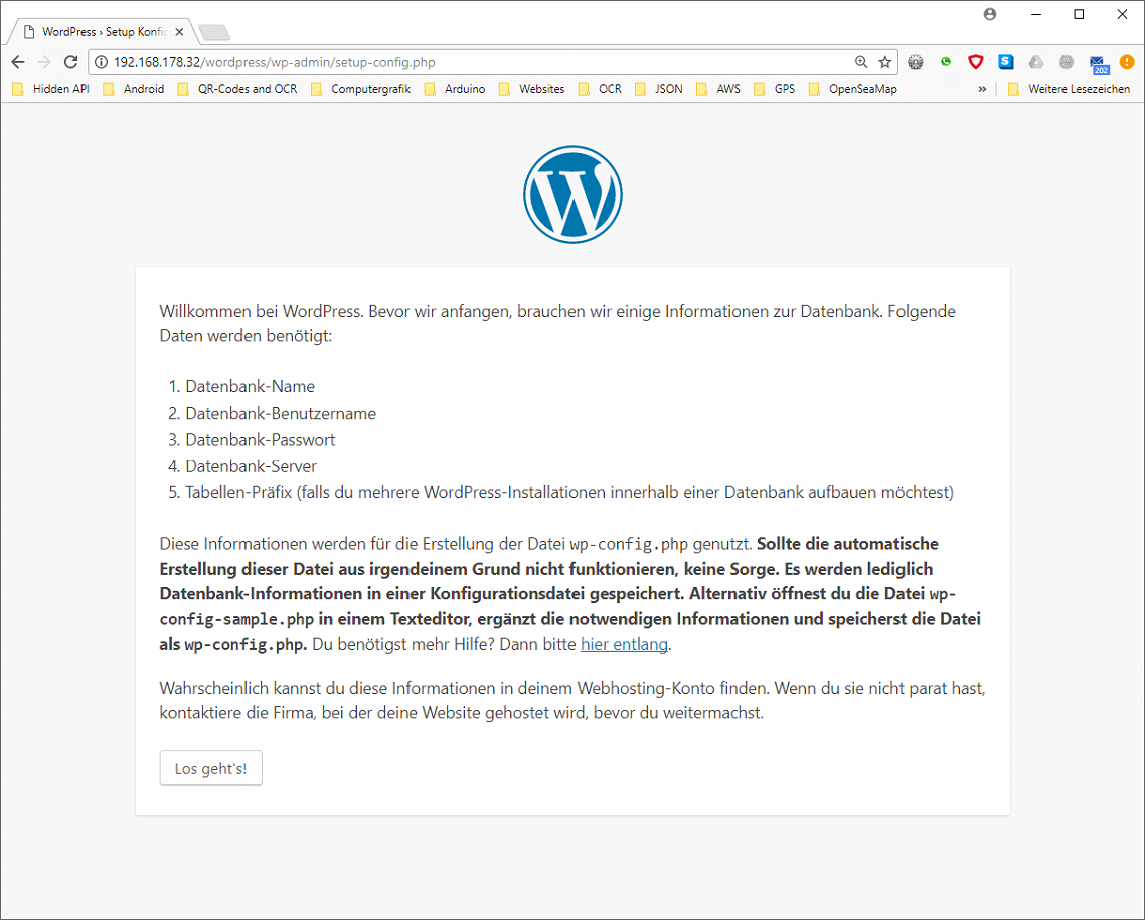
Webseite auf dem PC aufrufen:
http:///wordpress
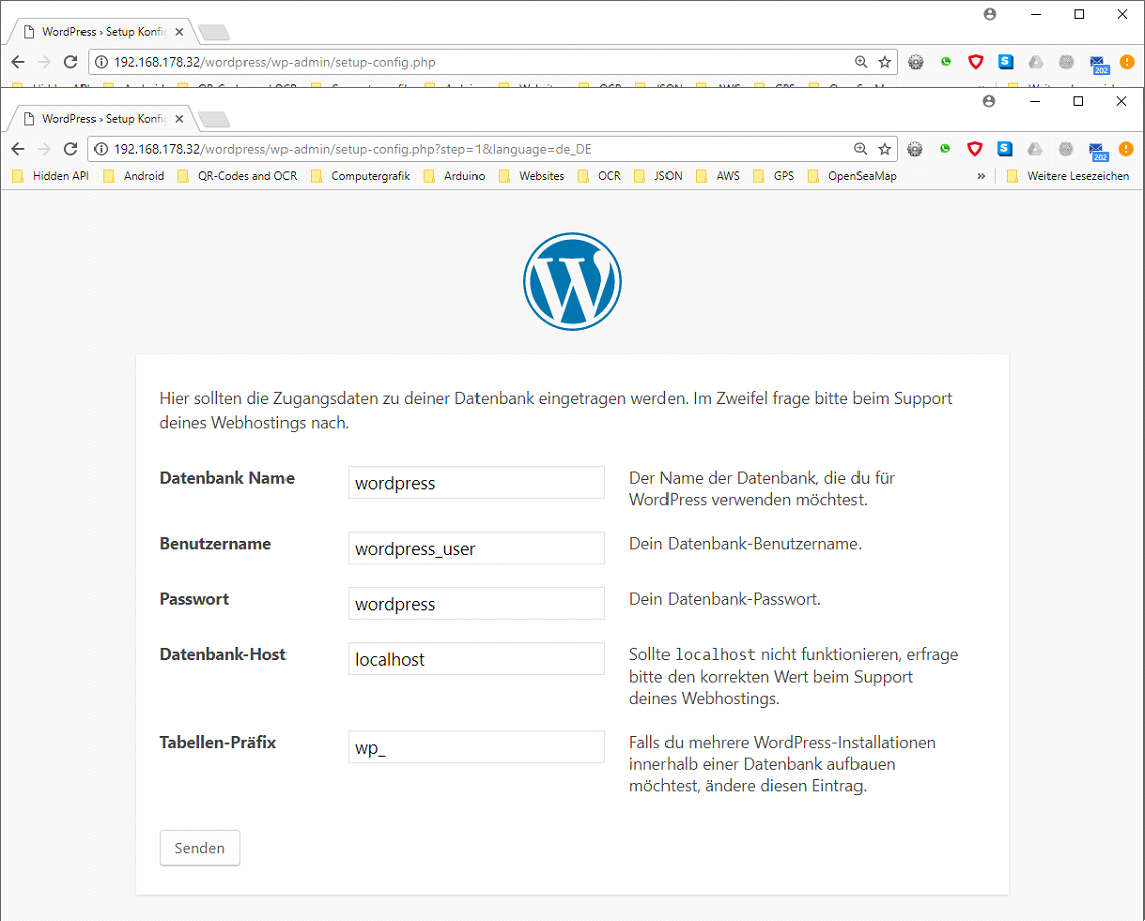
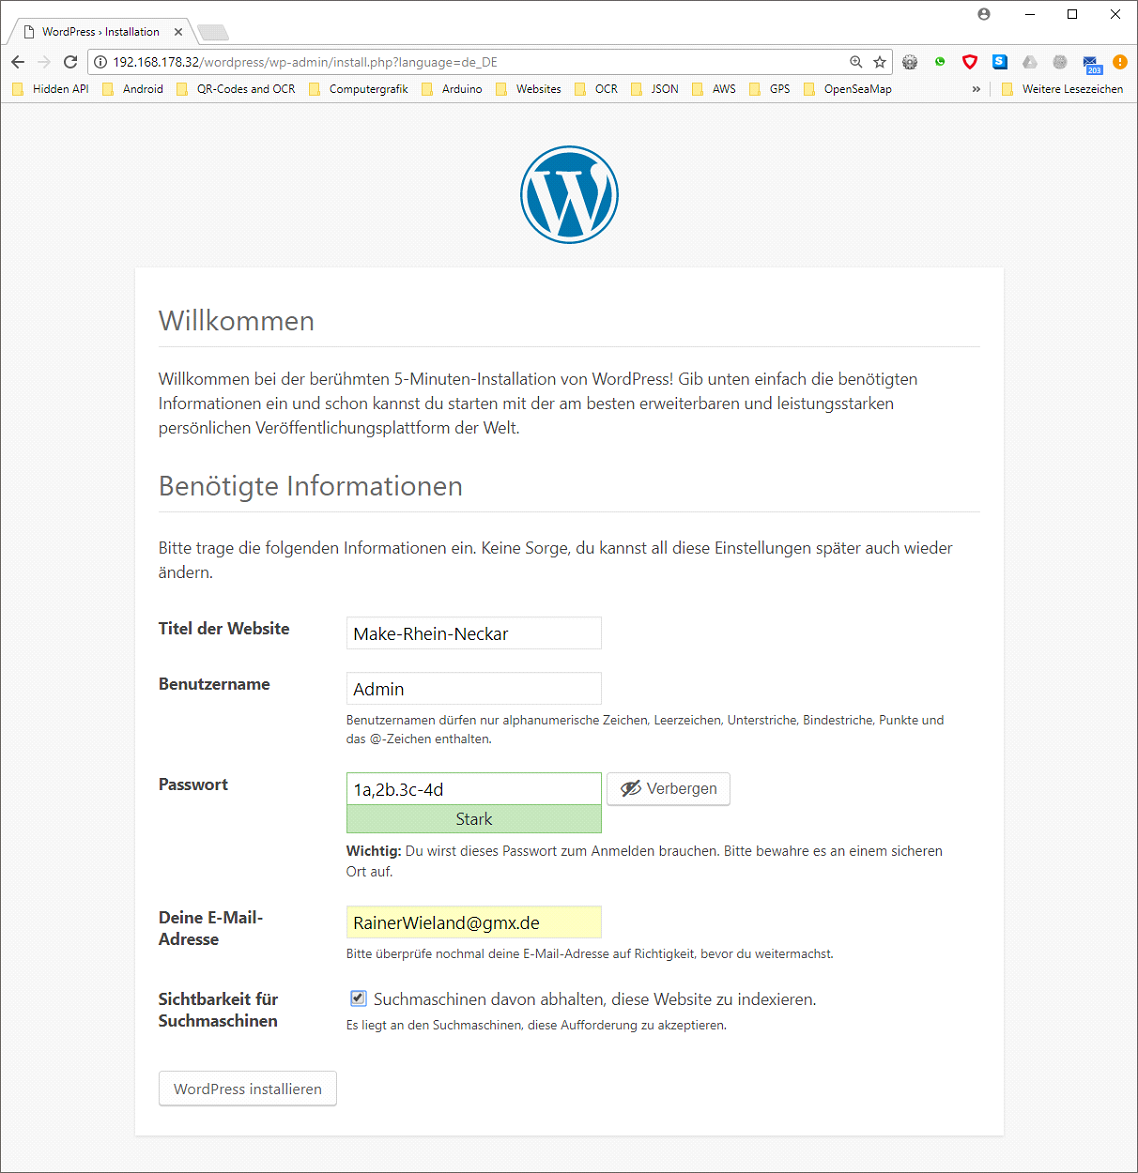
WordPress einrichten
Webseite auf dem PC aufrufen:
Datenbankbezeichnung und Datenbankbenutzer einragen (siehe oben)

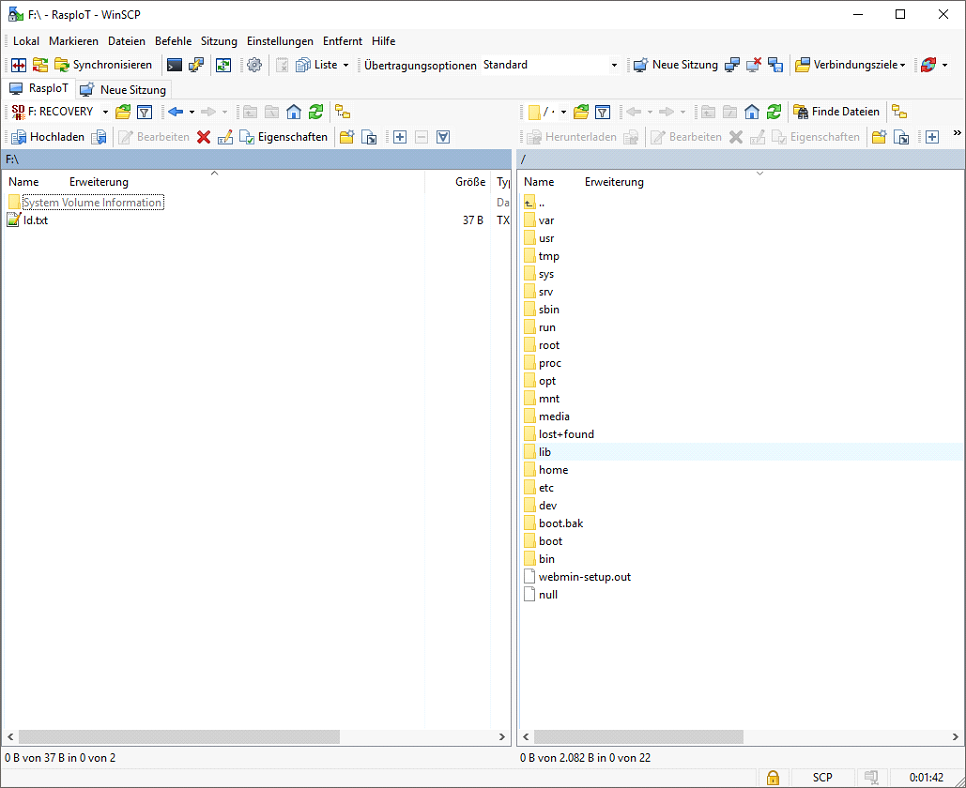
WinSCP starten und mit Raspberry verbinden (anmelden)
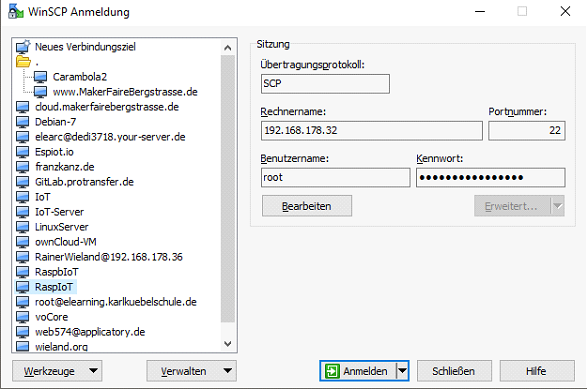
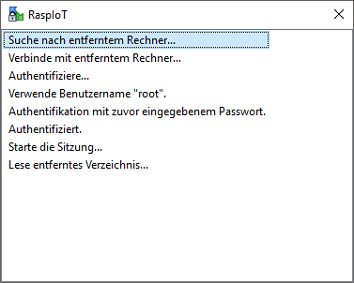
In das wordpress-Verzeichnis wechseln
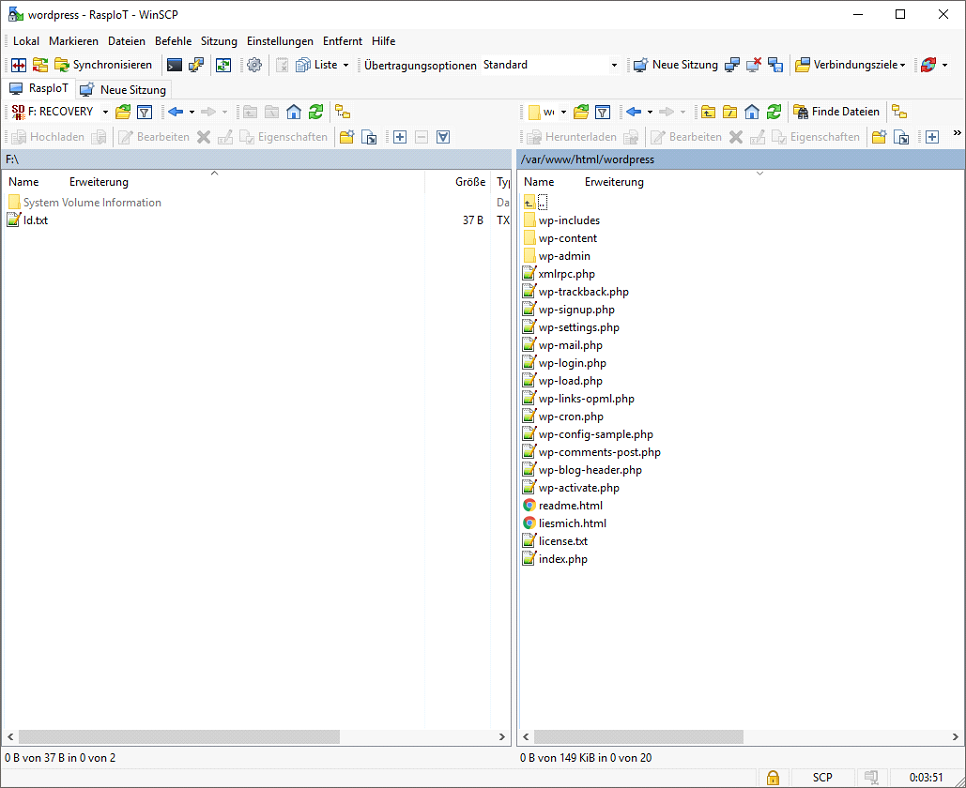
Datei wp-config.php neu anlegen (Shift-F4) und Daten hinein kopieren
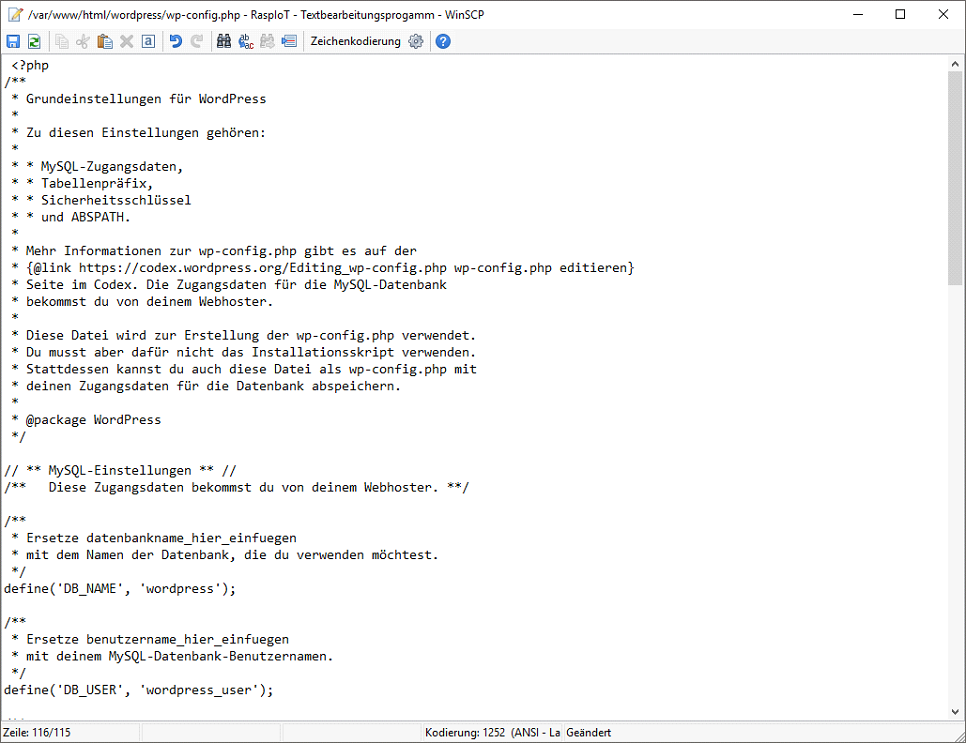
Datei Speichern (Disketten-Symbol) und schließen. Anschließend wieder auf die Webseite gehen und „Installation ausführen“
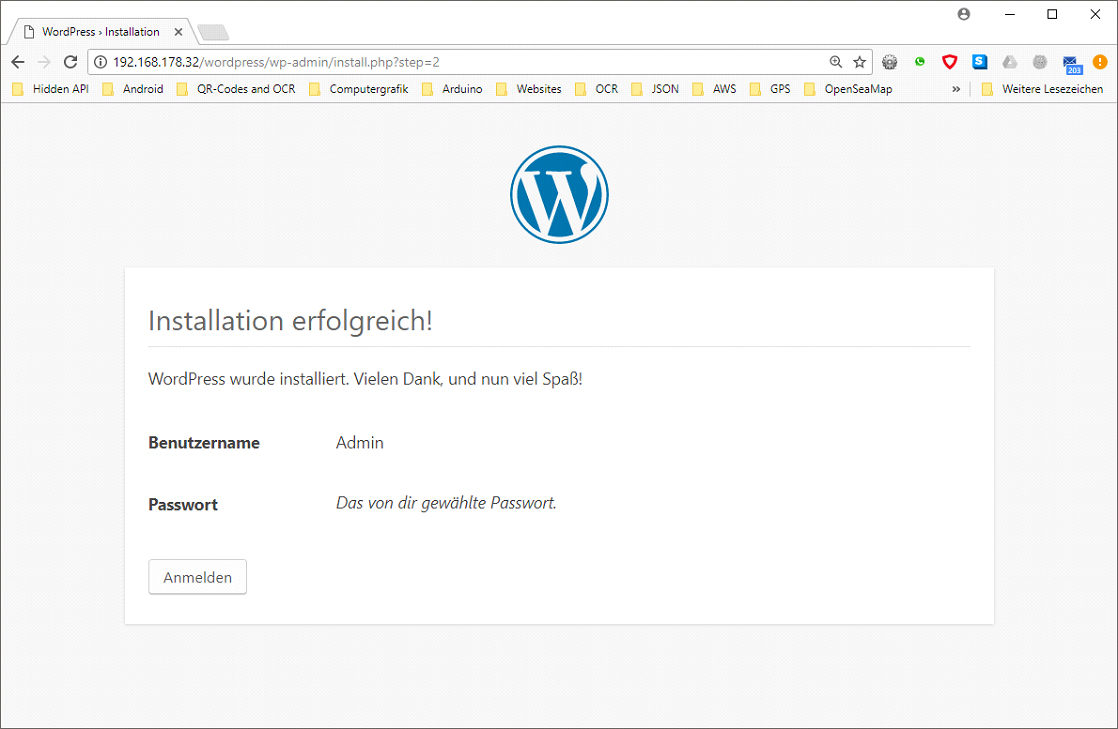
Mit Zugangsdaten anmelden
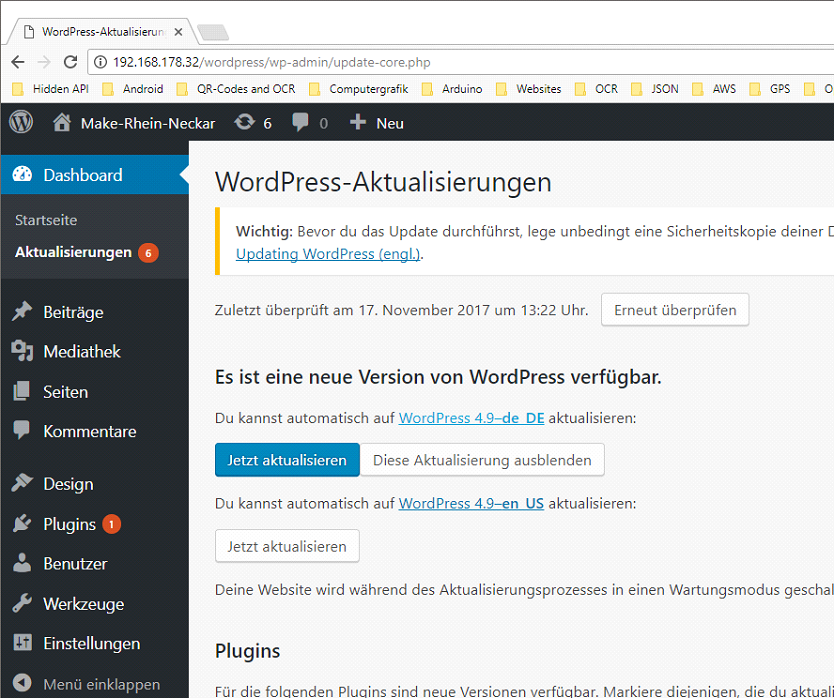
WordPress aktualisieren
HTTPS-Zertifikate installieren
Sourceliste unter … mit
deb http://deb.debian.org/debian stretch-backports main contrib non-free
deb-src http://deb.debian.org/debian stretch-backports main contrib non-free
erweitern
Ausführen von
apt-get update
und
 chown -R www-data:www-data /var/www/html/www.iot4bees.de
 in /etc/apache2/sites-enabled
und
in /etc/apache2/sites-available
Die Datei (bzw, den symlink zu default http.conf löschen)
dann
 apt-get install certbot python-certbot-apache -t stretch-backports
 certbot --apache
Bootreihenfolge anpassen
Notwendige Pakete installieren (falls noch nicht geschehen)
apt-get install insserv graphviz
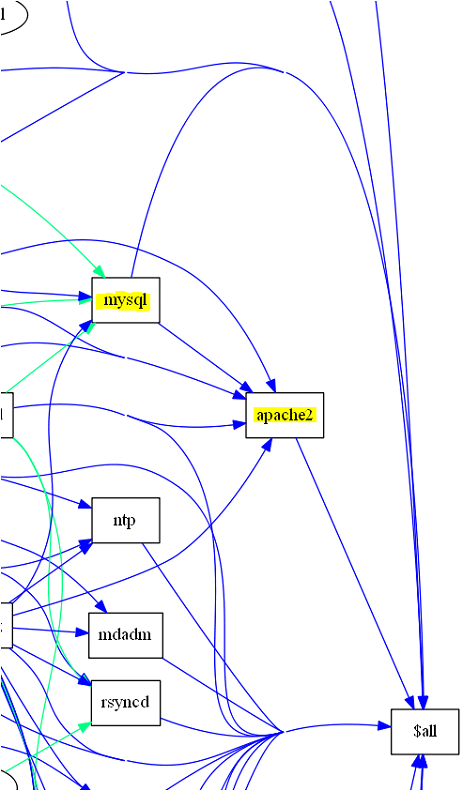
Bisherige Bootreihenfolge grafisch ausgeben
/usr/share/insserv/check-initd-order -g > /tmp/boot.dot
Datei mit WinScp auf PC herunterladen und mit dotty, gvedit etc. ansehen/ausdrucken
Beipiel:
Momentan startet Apache unabhängig von mysql.
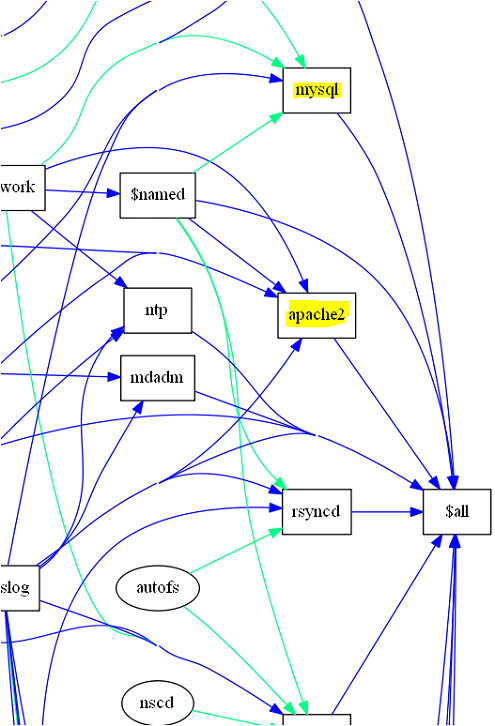
Apache soll erst nach mysql starten (eventuelle Webserverfehler wg. SQL werden damit schneller erkannt). Abhängigkeiten in der entsprechenden rcx.d unter /etc/init.d ändern (siehe unten)
Datei /etc/init.d/apache2 editieren
Vorher (hier nur Teil des LSB Header angezeigt):
# Provides: apache2
#Required-Start: $local_fs $remote_fs $network $syslog $named
#Required-Stop: $local_fs $remote_fs $network $syslog $named
Nachher
# Required-Start: $local_fs $remote_fs $network $syslog $named mysql
# Required-Stop: $local_fs $remote_fs $network $syslog $named mysql
Datei speichern und mit update-rc.d apache2 defaults aktivieren
Neue Bootreihenfolge grafisch ausgeben (siehe oben) und Ergebnis prüfen
Bootvorgang etwas beschleunigen (nicht bei Raspberry)
In /etc/default/grub
den Wert GRUB_TIMEOUT=5 auf GRUB_TIMEOUT=1 setzen.
Anschließend mit update-grub die Änderung für das nächste Booten aktivieren.
Befehltsübersicht:
#dhcpd neu starten
systemctl daemon-reload
 service dhcpcd restar
# Reload WLan0
ip link set wlan0 down; ip link set wlan0 up
netstat -nlp

ps -aux
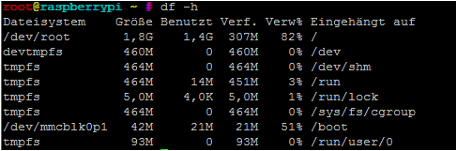
Festspeicherauslastung prüfen:
apt-get install --dry-run <something>
reboot
shutdown now
apt-get install --reinstall nfs-common rpcbind initscripts insserv
Node-RED
Installation instructions
Node.js v9.x:
# Using Debian, as root
curl -sL https://deb.nodesource.com/setup_9.x | bash -
apt-get install -y nodejs
npm update -g npm
npm install -g --unsafe-perm node-red
npm install -g bignumber.js require-all readable-stream mysql node-red-node-mysql

/etc/init.d/node-red
#!/bin/bash
### BEGIN INIT INFO
# Provides:          node-red
# Required-Start:    $local_fs $remote_fs $network
# Required-Stop:     $local_fs $remote_fs $network
# Default-Start:     2 3 4 5
# Default-Stop:      0 1 6
# Short-Description: Start or stop the node-red server
### END INIT INFO
# Can be downloaded and installed in one go by using this command
# sudo wget -O /tmp/download https://gist.github.com/Belphemur/cf91100f81f2b37b3e94/download && sudo tar -zxf /tmp/download --strip-components 1 -C /etc/init.d && sudo chmod +x /etc/init.d/node-red && sudo update-rc.d node-red defaults

# User that launches node-RED (it's advised to create a new user for Node-RED)
# You can do : sudo useradd node-red
# then change the USER=root by USER=node-red
# if you change the user, don't forget to also change the ownership of the log file (and create it if it doesn't exist):
# sudo chown NEWUSER /var/log/node-red.log
# else the log won't be writtable
USER=root

# The location of Node-RED configuration, not mandatory, leave empty/commented to let
# Node-RED decides.

#USER_DIR='/home/pi/node-red/'
USER_DIR='/root/.node-red'


# DONT'T CHANGE unless you know what you're doing
NAME=node-red

DAEMON=/usr/bin/node-red

#OPTIONS="--max-old-space-size=128"

if [ -n "$USER_DIR" ];  then
	OPTIONS="$OPTIONS --userDir=$USER_DIR"
fi

LOG='/var/log/node-red.log'

PIDFILE=/var/run/node-red.pid

. /lib/lsb/init-functions

start_daemon () {
        start-stop-daemon --start --background \
        --chuid $USER --name $NAME \
                $START_STOP_OPTIONS --make-pidfile --pidfile $PIDFILE \
        --startas /bin/bash -- -c "exec $DAEMON $OPTIONS >> $LOG 2>&1"
                log_end_msg 0
}

stop_daemon () {
	echo "Stopping NODE-RED"
	pidfile=`grep "^PIDFILE=" /etc/init.d/node-red | sed -e 's/PIDFILE=//g'`
	kill `cat $pidfile`
}

case "$1" in
        start)
                        log_daemon_msg "Starting daemon" "$NAME"
                        start_daemon

        ;;
        stop)
                        log_daemon_msg "Stopping daemon" "$NAME"
                        stop_daemon
#                         start-stop-daemon --stop --quiet \
#            --chuid $USER \
#            --exec $DAEMON --pidfile $PIDFILE --retry 30 \
#            --oknodo || log_end_msg $?
#                        log_end_msg 0
        ;;
        restart)
			$0 stop
			sleep 5
			$0 start
		;;
		status)
        status_of_proc "$DAEMON" "$NAME"
        exit $?
        ;;

        *)
                echo "Usage: $0 {start|stop|restart}"
                exit 1
esac
exit 0

update-rc.d node-red defaults


wget http://repo.mosquitto.org/debian/mosquitto-repo.gpg.key
apt-key add mosquitto-repo.gpg.key
nano /etc/apt/sources.list.d/mosquitto.list


https://forum.fhem.de/index.php?topic=75537.0


cd /etc/apt/sources.list.d/
wget http://repo.mosquitto.org/debian/mosquitto-stretch.list
apt-get update
apt-get install libwebsockets8
apt-get install zlibc zlib1g zlib1g-dev
apt-get install libssl1.1
apt-get install openssl
apt-get install libmosquitto1
apt-get install cmake
apt-get install libwebsockets-dev
apt-get install openssl-dev
Node-Red:0107pg

useradd -r -m -d /var/lib/mosquitto -s /usr/sbin/nologin -g nogroup mosquitto

cd /tmp
wget http://mosquitto.org/files/source/mosquitto-1.4.14.tar.gz
tar xavf mosquitto-1.4.14.tar.gz
cd mosquitto-1.4.14

We need to edit the config.mk file and change the option WITH_WEBSOCKETS:=no  to WITH_WEBSOCKETS:=yes
make clean
make
make test
make install
apt-get install mosquitto


Alternativ:

apt-get install autoconf
apt-get install libxml2-dev
cd /tmp
wget http://de2.php.net/get/php-7.0.25.tar.gz
tar xvf php-7.0.25.tar.gz
wget http://oss.oetiker.ch/rrdtool/pub/contrib/php_rrdtool.tar.gz
cd php-7.0.25
cd ext/
tar xvf /tmp/php_rrdtool.tar.gz
remove configure
updatedb
./buildconf --force
./configure --with-rrdtool


nach /usr/local/src/ wechseln
wget http://oss.oetiker.ch/rrdtool/pub/contrib/php_rrdtool.tar.gz
tar xvf php_rrdtool.tar.gz
cd rrdtool
apt-get install build-essential
whereis gcc make
gcc -v
make -v
./buildconf
./configure
make clean
make
make test
make install
